
Step 1: Description & Term
At the top left of the screen on the Add Leases workflow, select the Accounting Standard and then Lessee or Lessor for GASB 87 or 94. (Note, Lessor is not applicable to GASB 96)
The Description & Term tab shows the following required fields: Accounting Standard, Accounting for (Lessee or Lessor where applicable) Reporting Entity, Lease Name, Asset Type, Start Date and End Date, Term and Lease Asset Life of the lease or subscription.
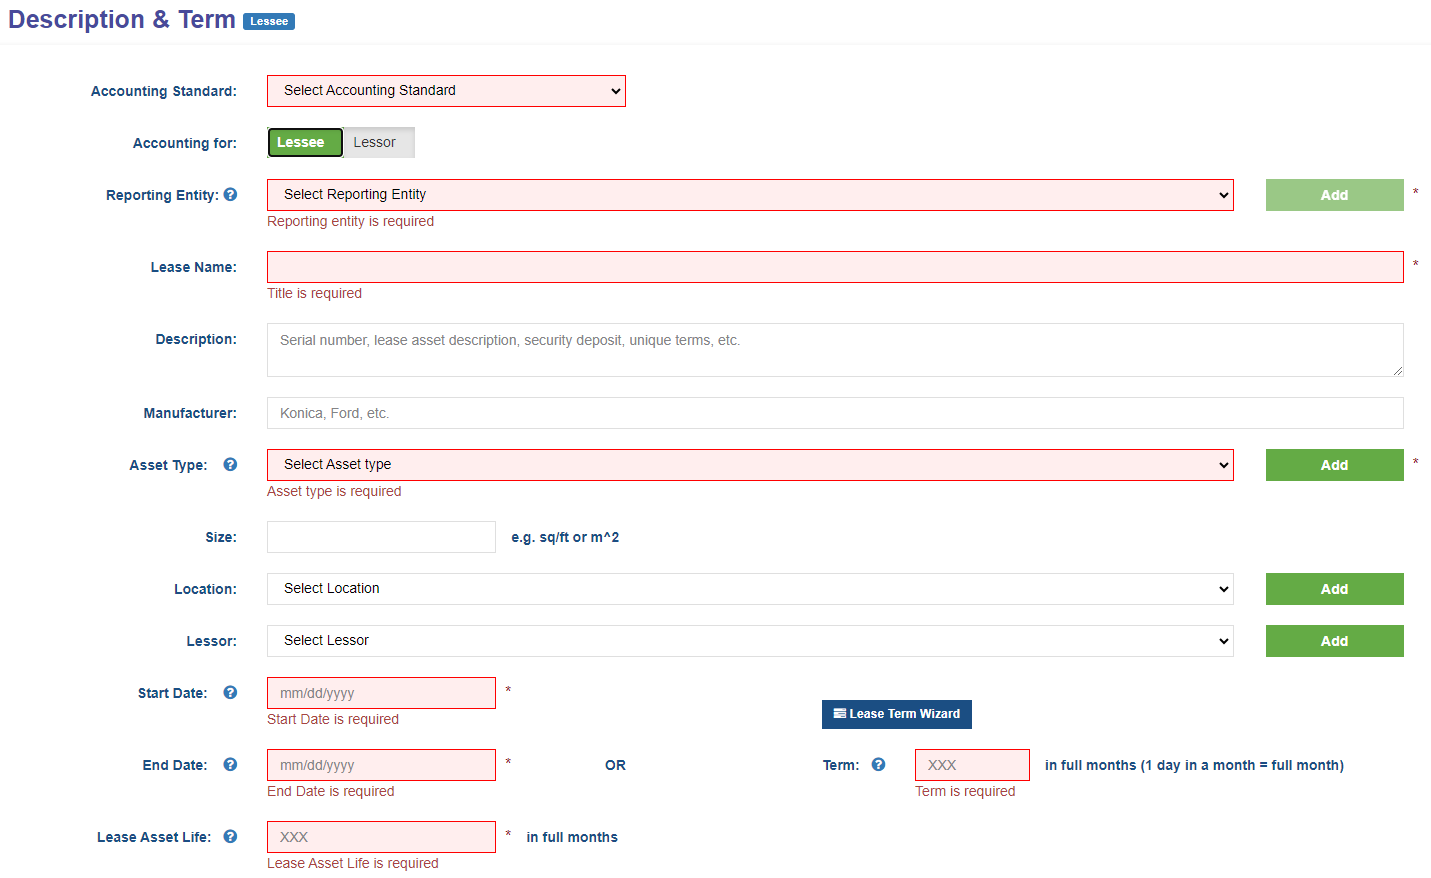
Note: If you are entering a Lessor lease, there is no field for Lease Asset Life.
The  to assists with entering the lease term details. Click here for assistance with using the Lease Term Wizard.
Note: Once the Lease Term Wizard is used, the Start Date, End Date and Term fields are greyed out and can only be changed again by navigating back through the Wizard.
For additional information about the required information, click on the blue question mark next to any topic. ![]()
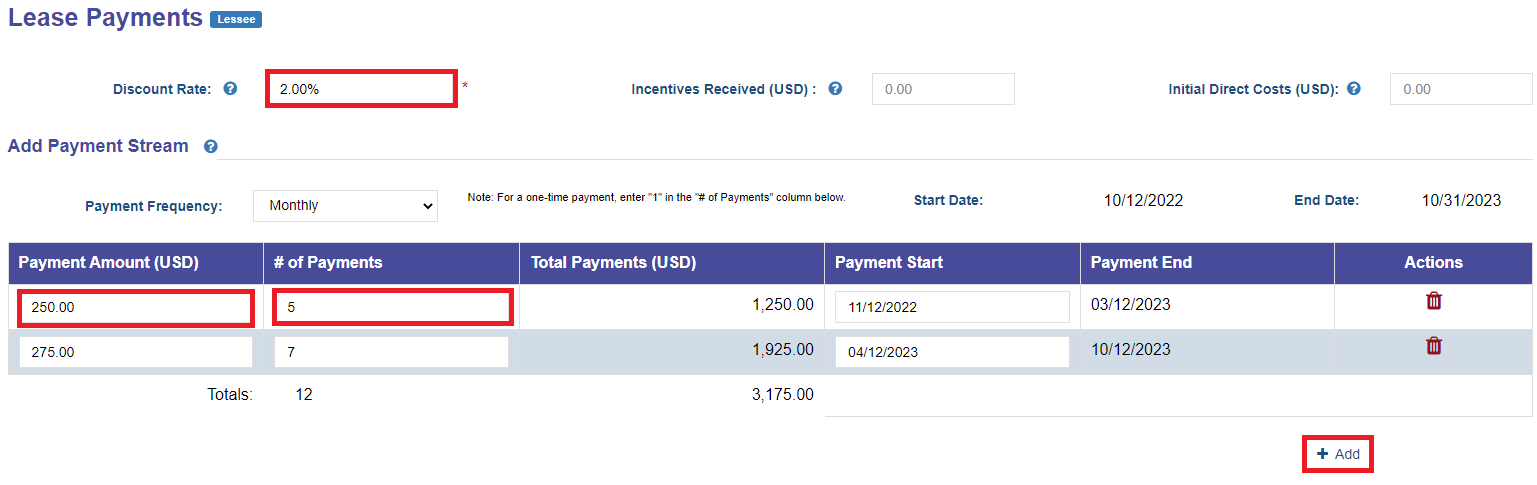
Step 2: Lease Payments/Lease Receipts
The Lease Payments/Receipts tab shows the following required fields: Discount Rate and Payment Streams, including Payment Frequency, Payment Amounts, Number of Payments, and Payment Start Date. To add additional payment stream information, click the  button in the bottom right.
Step 3: GL Accounts
The GL Accounts tab shows the GL Accounts associated with the Reporting Entity selected on Step 1 Description & Term. If there is only one GL Account, it is preselected. Details about adding GL accounts can be found by here.
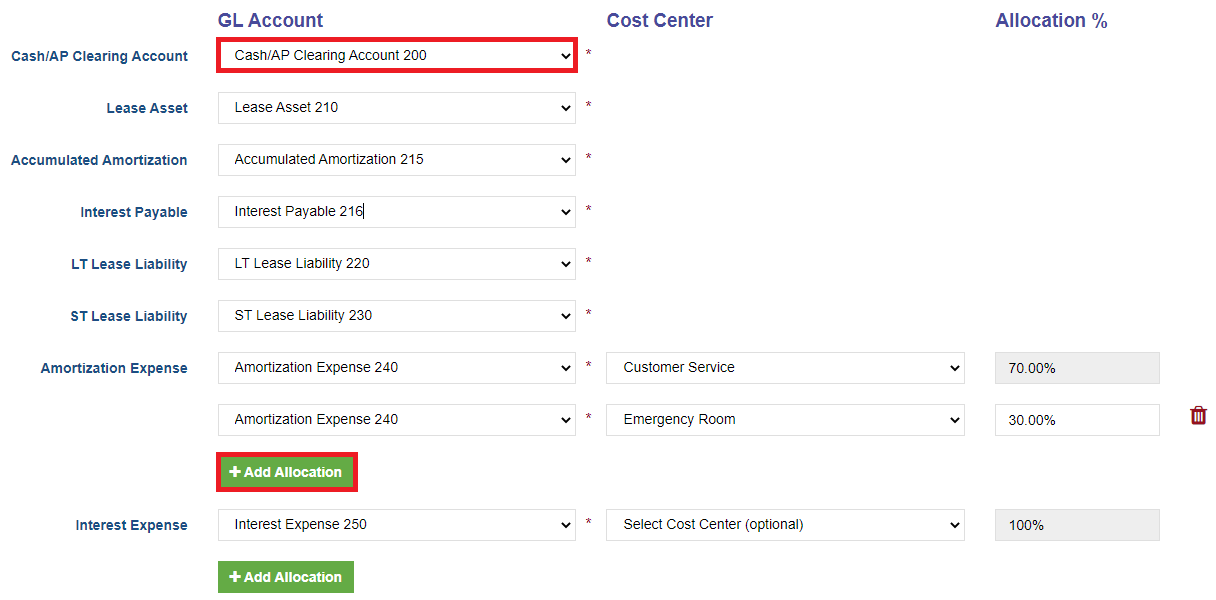
Expenses can be allocated to Cost Centers by selecting Add Allocation.
A maximum of 10 Cost Centers can be allocated per lease.
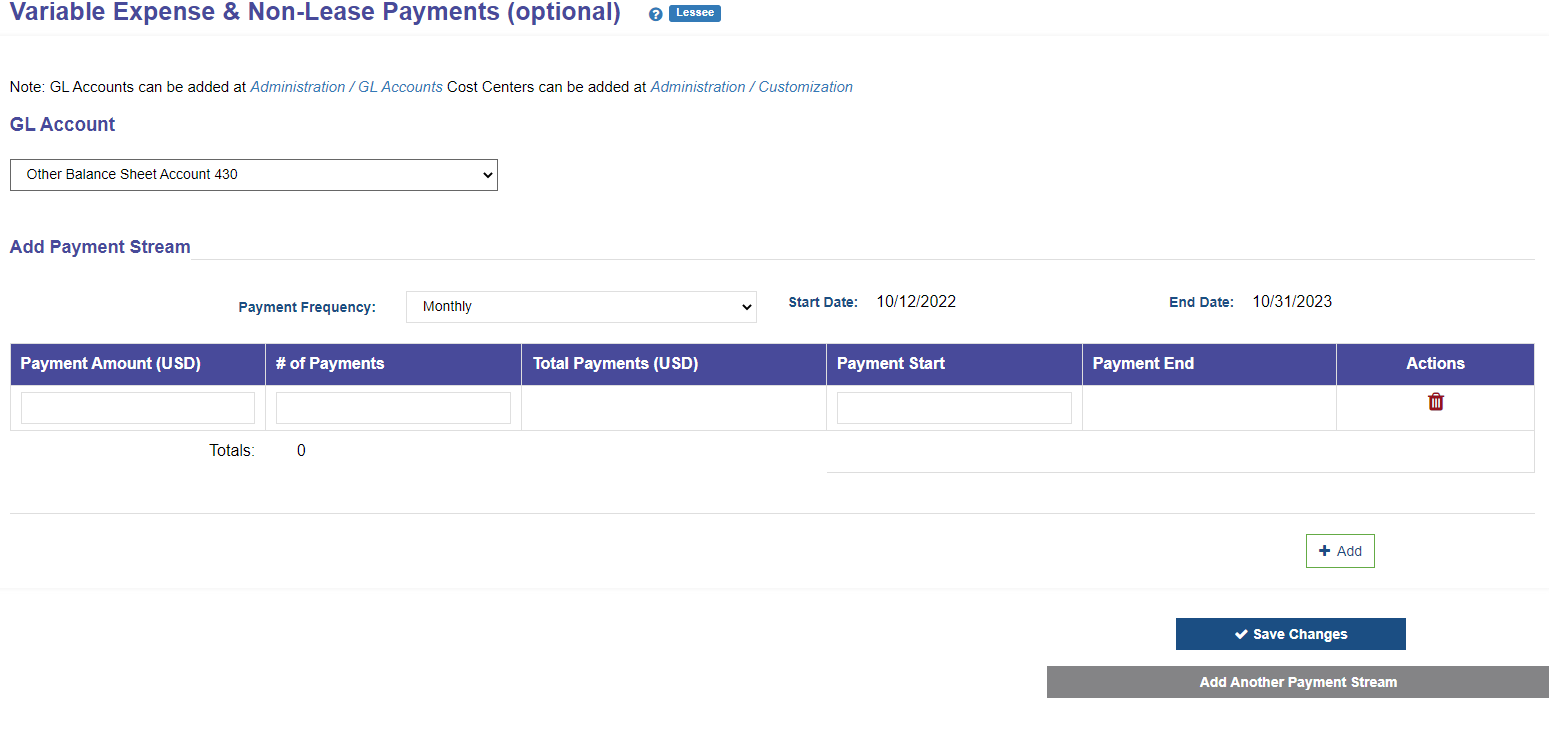
Step 4: Variable Expense & Non-Lease Payments
Click Next to enter Variable Expense & Non-Lease Payments. This step is optional and works exactly like the Lease Payments tab. Variable Expenses and Non-Lease payments are not required however entering the details here will ensure a complete lease/subscription record.
Step 5: Attach Documents
To attach documents related to this lease or subscription, upload unlimited lease documents.

Step 6: Review
If an Administrator has turned on Review + Approve, users are required to complete the Review screen by clicking Submit for Review.
Optionally, users can choose to notify another user by selecting the email address. Note the user much be a LeaseCrunch Client Account user in order to receive email notifications and approve the lease.

Click the Submit for Review button to send the optional notification and navigate to My Leases.